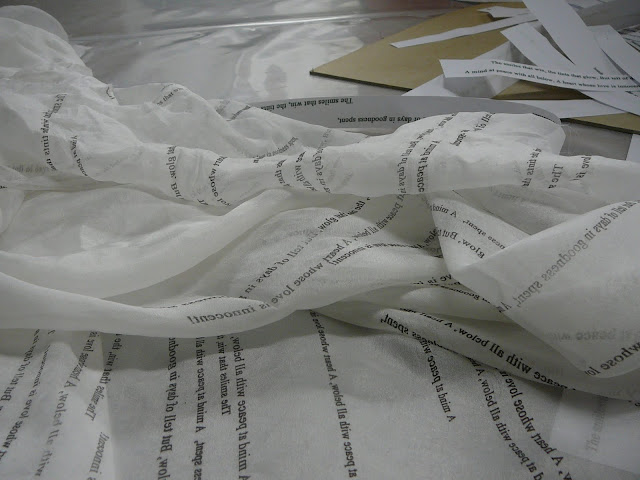
I may have mentioned this in eariler posts but this was a piece that I started, draped as a dress, and then didn't move on for a couple months. In retrospect I think that's because I wasn't happy with the idea that I been thinking of as "resolved". One day, after completely re-evaluating my past student work (more on that in another post) and considering what direction I wanted my practice to go in, I was re-inspired. Like a strike of lightening I knew exactly what I wanted to do, how it would work together, and immediately got excited about working on it: generally a good sign when I'm heading in the right direction.
So, I got on the computer and prepared some text for transfer, more on this process and my brain in this post.
Once the printing was done, and ready to transfer was the true test of my resolve. Sometimes, when making I can get so far on an idea and know that if I mess it up, or are unhappy with the results, or change my mind, it's still reversible, or at least something that can be salvaged. But, there always seems to be this one moment where it's the cliched "point of no return". Whether it's cutting into fabric that I have limited supply of, laying paint or marker on a half done piece, or any number of other things I just think of now, it's a terrifying, but exhilarating moment. It's a moment of Faith, where I just have to trust my instincts and hope that things work out. With this dress it was transferring the first of the text along the hem. If I didn't like it, the dress (and all the work I had done up until this moment) was done, there would be no way to cut it off, or cover it up. I'd have to start all over, or scrap it entirely.
Deep breath.
So, to minimize careless muck-ups of my piece, I meticulously laid out all the text, pinned it on the dress, and put it back on my dress form to see how it would fall. After all the prep I could do, I just had to go for it, and start transferring.
Below are pics of the process which, once I started and was satisfied I was happy with how things were going, I enjoyed every minute of. Once I started this, it was only about another week until the dress was done.
 |
| The dress I draped a couple months ago, then left. |
 |
My hem being circular, and my text being rectangular, I had to cut the text up into 2-3 line strips, place, and pin each piece, making sure the direction made sense when the dress was hung. |
 |
| Text strips, cut and laid over my template to make sure they didn't get mixed up. |
 |
| My tools for this project: pins, photochemical transfer pen, and a spoon. Yes a spoon (to help transfer the text from paper to fabric, once the transfer pens act as a solvent). |
 |
| A few hours of fumes? Not the best thing. And since I don't want holes in my nose, I went for the respirator (and of course, many Darth Vader moments). |
More pictures after the jump!
 |
| Many, many strips of paper later... |
| A wee bit of a messy process, but very happy with the results! |


No comments:
Post a Comment